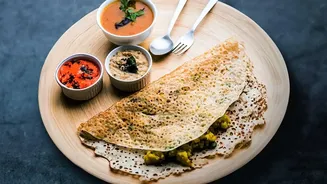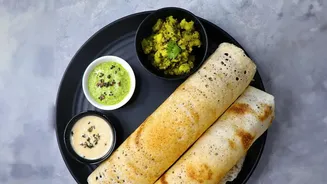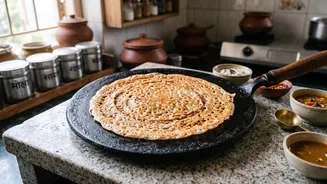


The perfect dosa, with its golden, paper-thin crispiness, is a culinary masterpiece. Many believe this perfection is only achievable in restaurants, but the secret often lies in mastering the traditional cast-iron tawa. Here’s your guide.
Why Cast Iron Is King
Before diving
into technique, it’s important to understand why cast iron is the preferred surface for traditional dosa making. Unlike modern non-stick pans, a cast-iron tawa excels at heat retention and distribution. It holds a steady, even temperature across its entire surface, which is crucial for cooking the dosa uniformly without charring it in some spots and leaving it raw in others. Over time, with proper care, cast iron develops a natural non-stick surface called a patina. This layer of polymerised oil gets better with every use, making the tawa a lifelong kitchen companion that is free from chemical coatings.
The Crucial First Step: Seasoning
A new cast-iron tawa needs to be seasoned before its first use to prevent the batter from sticking. Start by washing the tawa with warm water and a mild soap to remove any factory residue, then dry it completely. Apply a thin layer of a high-smoke-point oil, like sesame or vegetable oil, across the entire cooking surface with a cloth. Heat the oiled tawa on a medium flame for several minutes until it begins to smoke lightly, then turn off the heat and let it cool. Repeating this process a few times helps build a strong initial seasoning layer. An age-old trick is to rub the hot surface with half an onion dipped in oil before making your first dosa; this helps create a wonderfully non-stick surface.
Perfecting Your Batter
Even the best tawa can’t save a bad batter. The ideal dosa batter has two key attributes: proper fermentation and the right consistency. Fermentation, which typically takes 8-12 hours in a warm place, is what gives the dosa its characteristic slightly sour flavour and airy texture. You'll know the batter is ready when it has risen, appears bubbly, and smells yeasty. The consistency should be pourable but not watery—often described as similar to a thin pancake or crepe batter. If the batter is too thick, the dosa will be heavy; if it’s too thin, it won’t spread properly. It's also best to use batter that's at room temperature, as cold batter from the fridge can cool down the tawa too quickly.
Mastering the Temperature
Getting the tawa to the correct temperature is perhaps the most critical part of the process. If the pan is too cold, the dosa will stick; if it's too hot, the batter will seize and cook before you can spread it. The classic method to check the temperature is the water_drop test. Preheat your tawa on a medium flame for a few minutes, then sprinkle a few drops of water onto the surface. If the drops sizzle and evaporate almost immediately, the tawa is ready. If they just steam and sit, it's too cold. If they vanish instantly with a sharp crackle, it's too hot; in this case, turn the flame down or wipe the surface with a damp cloth to cool it slightly.
Mastering the Spreading Technique
Once your tawa is hot, lightly grease it with a few drops of oil, using a cloth or the onion half. Pour a ladleful of batter into the center of the pan. Working quickly, use the flat back of the ladle to spread the batter outwards in a continuous spiral motion. Apply gentle pressure and try to make the layer as thin as possible in one smooth movement, without going back over spots you've already covered. Drizzle a little oil or ghee around the edges of the dosa. This helps the edges get wonderfully crisp and makes it easier to lift.
Troubleshooting Common Issues
Don’t be discouraged if your first few dosas aren’t perfect. If the dosa sticks, it’s usually because the tawa wasn't hot enough or the seasoning is still developing. If the batter clumps and won't spread, the tawa is likely too hot. A soft, pale dosa is a sign of insufficient heat or a batter that was spread too thickly. The key is patience: wait until the edges start to turn golden brown and lift on their own before trying to fold or remove any dosa from any pan. With each batch, you'll get a better feel for your stove, your tawa, and your batter.