





The Joy of Making More
Propagating plants is more than just a horticultural technique; it's a sustainable way to create new life from something you already nurture. Instead of buying new plants, you can simply clone your favourites, producing exact replicas to fill your home
or share with friends and family. This process is not only economical but also deeply satisfying. Watching a simple stem or leaf cutting develop its own roots and grow into a full, independent plant provides a unique sense of accomplishment and a deeper appreciation for the resilience of nature.
Picking the Right Plant
Success in propagation often starts with choosing the right candidate. Some houseplants are famously easy to root, making them perfect for beginners. Vining plants like Pothos, Heartleaf Philodendron, and English Ivy are excellent choices as they readily sprout roots from nodes along their stems. Other reliable options include the resilient Snake Plant, Spider Plants which produce their own 'pups', and many varieties of Tradescantia. These plants are forgiving and tend to root quickly, providing a rewarding first experience.
The Essential Toolkit
You don’t need a laboratory of special equipment to start propagating. Most of the necessary tools are likely already in your home. The first essential is a clean, sharp cutting tool, like a pair of scissors or a small knife. Using a sterile blade prevents the introduction of bacteria that can cause your cutting to rot. You will also need a container for your new cutting, such as a glass jar for water propagation or a small pot with drainage for soil propagation. Finally, have fresh water or a suitable rooting medium, like a sterile, well-draining potting mix, on hand.
How to Make the Perfect Cut
Where you cut is the most critical factor for success. You need to include a 'node', which is the point on a plant's stem where leaves, branches, and roots emerge. Look for a small bump or the spot where a leaf is or was attached. For most vining plants, a healthy cutting should be four to six inches long and include at least one or two nodes. Make a clean cut with your sterilized tool just below a node. Once you have your cutting, remove any leaves on the lower portion of the stem that might otherwise end up submerged in water or soil, as they can rot and contaminate your project.
Water vs. Soil Propagation
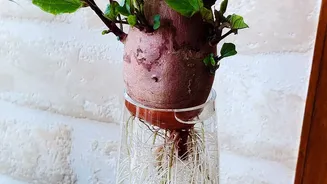
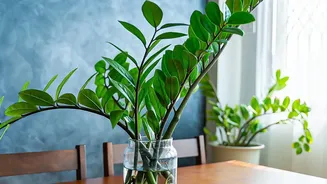
You have two main paths to rooting your cutting: water or soil. Water propagation is popular because it’s clean and allows you to watch the roots grow, which can be exciting. Simply place the cutting in a jar of water, ensuring the nodes are submerged but the leaves are not. However, these 'water roots' can experience shock when later moved to soil. Propagating directly in a moist potting mix encourages the growth of stronger roots that are already adapted to soil conditions. For this method, you can dip the cut end in rooting hormone to speed up the process before planting it in a pot. While many soft-stemmed plants do well in water, woodier plants often perform better in soil.
Patience, Light, and Care
After setting up your cutting, the waiting game begins. Cuttings need bright, indirect light to generate the energy required for root growth, but direct sunlight can scorch them. If you're propagating in water, change the water every few days to keep it fresh and prevent bacterial growth. For soil propagation, keep the medium consistently moist but not waterlogged to avoid rot. Creating a humid environment, perhaps by placing a plastic bag over the pot, can also prevent the cutting from drying out. Roots can take anywhere from a few weeks to a few months to appear. Once the roots are an inch or two long, you can transplant your new plant into a more permanent pot.