





The Tradition We All Followed
It is one of the most passed-down pieces of gardening advice. Whether from a grandparent, a television show, or just a sense of intuition, many of us believe that a layer of rocks, gravel, or broken pottery shards at the bottom of a container is essential.
The logic seems sound: creating a coarse layer at the base of a pot should surely allow excess water to drain away more freely, preventing the soil from becoming a waterlogged mess and saving our plants from the dreaded root rot. This practice is so ingrained that it often goes unquestioned, seen as a foundational step for any successful container garden. The intention is good, aiming to create a healthy environment where roots can thrive, free from the threat of sitting in stagnant water.
The Science That Says Otherwise
Here is where the old wisdom falters. Modern horticultural science has shown that instead of improving drainage, adding a layer of gravel at the bottom of a pot does the opposite. The issue lies in a scientific principle known as a "perched water table." Water does not move easily from a fine-textured material (like potting soil) to a coarse-textured one (like gravel). Think of a sponge placed on top of a bed of pebbles. The sponge won't start dripping water into the pebbles until it is completely saturated. The same thing happens in your planter. The potting soil will hold onto water until it is fully saturated, and only then will gravity force excess water to move into the gravel layer below. This means a layer of soggy, saturated soil will form and 'perch' directly on top of the gravel.
Raising the Risk of Root Rot
The unfortunate consequence of creating this perched water table is that you are effectively raising the waterlogged zone higher up in the pot, closer to your plant's delicate root system. Instead of giving the roots more well-drained soil, you have reduced the usable volume of healthy soil in the container. This soggy layer at the bottom of the pot creates anaerobic conditions, meaning it lacks oxygen. Plant roots need oxygen to survive and function properly. When they are stuck in waterlogged, oxygen-deprived soil, they cannot absorb nutrients and are highly susceptible to fungal and bacterial infections, which lead directly to root rot. Ironically, the very problem the gravel layer was meant to prevent is actually made worse.
The Modern Guide to Potting
So, if gravel is out, what is the best practice for ensuring healthy container plants? The answer is simpler and more effective: use a high-quality, uniform potting mix throughout the entire container, from top to bottom. True drainage is achieved not by layering materials, but by the structure of the soil itself and the presence of an unobstructed drainage hole. A good potting mix is engineered to provide the right balance of moisture retention and aeration. Ingredients like perlite, vermiculite, and compost create air pockets that allow water to flow through while holding just enough for the plant's needs. When you water a pot filled with a consistent mix, the entire soil column works together, allowing gravity to pull excess moisture down and out through the drainage hole at the very bottom.
Your New Container Potting Checklist
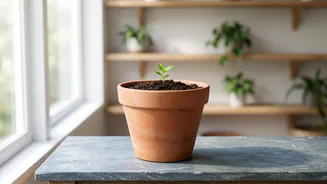
For healthier, happier plants, follow this straightforward approach every time you pot a new container: 1. Choose the Right Pot: Start with a container that has one or more adequate drainage holes. This is non-negotiable for preventing waterlogging. 2. Cover the Hole (Lightly): If you are concerned about soil washing out, place a single piece of mesh screen, a coffee filter, or a large shard over the hole, but do not create a thick layer. The goal is to keep the soil in, not to block water flow. 3. Use Quality Potting Mix: Never use soil straight from your garden, which is too dense and compacts easily in pots. Fill the entire container with a fresh, well-draining potting mix specifically designed for containers. 4. Plant and Fill: Place your plant in the pot and fill the surrounding space with more potting mix, leaving about an inch of space at the top to make watering easier. 5. Water Thoroughly: The first time you water, do so until you see a steady stream flowing out of the drainage holes. This ensures the entire soil column is evenly moist and confirms the drainage is working correctly.