






The Foundation: It All Starts with the Bread
The first, and arguably most important, decision in your Bombay Toast journey is the bread. Reach for that soft, fluffy, standard white sandwich bread and you are setting yourself up for failure. While delicious for a simple jam sandwich, its delicate
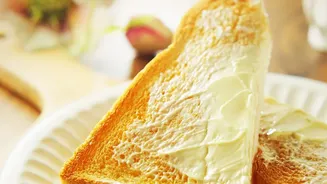
structure cannot withstand the moisture from the chutney and vegetable fillings. It absorbs liquid too quickly, turning limp and steaming itself into a sad, flimsy state on the pan. The solution is to choose a bread with integrity. A slightly denser, firmer loaf is what you need. Think of the sturdy slices from a local bakery, a day-old white bread that has lost some of its initial moisture, or even a whole wheat or multigrain bread. These breads have a more robust crumb structure that can hold its own against the wet ingredients. A generous application of butter on the outside of each slice before toasting is also a non-negotiable step. This creates a waterproof, golden-brown barrier that essentially fries the exterior, giving you that signature crunch while protecting the interior from turning into a mushy mess.
The Heart of the Matter: Controlling Your Filling
The second cardinal sin of Bombay Toast making is an unruly, water-logged filling. While a generous stuffing is desirable, more is not always better if it compromises the texture. The primary culprit is often the tomato, which releases a significant amount of water when heated. To combat this, slice your tomatoes thinly and, for best results, remove the seeds and watery pulp before adding them to the sandwich. Similarly, while boiled potatoes are a staple, ensure they are not over-boiled to the point of being mushy. They should be firm enough to slice cleanly. Onions and capsicum are generally safer bets, but they should also be sliced thinly for even cooking and layering. The legendary green chutney, a must-have for authentic flavour, should be of a thick, spreadable consistency, not watery. Applying a layer of butter to the bread before the chutney also adds another layer of protection. Finally, resist the temptation to overstuff. A well-packed but controlled single layer of each vegetable ensures the sandwich heats through properly and maintains its structural integrity from first bite to last.
Building a Better Toast: Assembly and Technique
With a firm bread and a dry filling, your chances of success are already high. But proper assembly and cooking technique will take your toast from good to great. Begin by laying out your buttered bread slices. Spread a layer of your thick green chutney on one or both inner sides. This not only adds a burst of fresh, spicy flavour but acts as a glue for the fillings. Next, arrange your sliced vegetables. Start with the potatoes, then layer on the onions, capsicum, and finally the deseeded tomatoes. Sprinkle your spices, like chaat masala or a dedicated sandwich masala, over the vegetables rather than mixing them into a wet paste. This keeps the moisture content down. Place the second slice of bread on top and press down gently but firmly. Generously butter the top exterior slice before placing it butter-side-down onto a hot pan or into a preheated sandwich press. Then, butter the new top side while the bottom is grilling.
The Final Touch: Achieving the Perfect Crunch
The final stage is the toast itself. Whether you are using a tawa, a grill pan, or an electric press, the key is medium heat. Heat that is too high will burn the butter and the bread before the filling is warmed through, while heat that is too low will cause the bread to slowly absorb moisture from the vegetables, leading to the dreaded sogginess. You are looking for a consistent, medium heat that allows the butter to sizzle and the bread to turn a deep golden-brown over the course of 3-4 minutes per side. If using a pan, press down on the sandwich with a flat spatula to ensure even contact and to help the layers meld together. Once both sides are perfectly crisp, remove the toast from the heat. For maximum crispiness, let it rest on a wire rack for a minute before slicing. This allows steam to escape instead of getting trapped underneath and softening the crust you worked so hard to create.