



Why Milk Is The Hero Ingredient
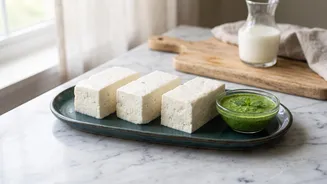
Making paneer is a simple act of chemistry. You heat milk and add an acid, which causes the milk proteins (casein) to coagulate and separate from the liquid whey. These solid curds are then strained and pressed to form a block of paneer. The quality of your
final product—its texture, creaminess, and yield—is determined almost entirely by the fat and protein content of the milk you start with. Using the right milk ensures you get soft, succulent paneer, while the wrong choice can lead to a dry, rubbery texture and a disappointingly small yield.
Choosing The Right Milk For The Job
For the best results, always opt for full-fat milk. Low-fat or skim milk lacks the necessary fat to create a creamy texture and will result in a hard, chewy paneer with a significantly lower yield. While cow's milk is the most common choice, buffalo milk, with its higher fat content (around 7-8%), produces an even richer and creamier paneer. Just as important is the pasteurization process. Avoid UHT (Ultra-High Temperature) or ultra-pasteurized milk. The intense heat used in this process denatures the milk's proteins to such an extent that they struggle to curdle properly, making it nearly impossible to form good-quality paneer. Stick to standard pasteurized or non-homogenized milk for the most reliable outcome.
The Art Of Curdling
The acid you use to curdle the milk also plays a role in the final texture. Lemon juice, vinegar, and yogurt are the most common choices. Vinegar tends to work fastest and creates a firmer paneer, while yogurt works more slowly but often yields the softest and creamiest result. Lemon juice is a popular middle ground. Regardless of your choice, the key is to add it gradually after the milk has come to a boil and you've turned off the heat. Pouring in too much acid all at once can make the curds tighten up, leading to a tougher paneer. Add the acid slowly, stirring gently, until you see the solids separate and the whey turns a clear, greenish-yellow color.
A Simple Step-by-Step Guide
Ready to try? Here’s a basic recipe. Start by bringing one litre of full-fat milk to a gentle boil in a heavy-bottomed pot, stirring occasionally to prevent scorching. Once it boils, turn off the heat and slowly stir in two to three tablespoons of lemon juice or vinegar. Let it sit for a few minutes until the curds fully separate from the whey. Line a colander with a few layers of cheesecloth or muslin and pour the mixture through it to strain the curds. Rinse the curds under cold water for about 30 seconds to wash away any residual acid taste and to stop the cooking process, which helps keep the paneer soft.
Pressing For Perfect Texture
After rinsing, gather the corners of the cheesecloth, twist to squeeze out some of the excess water, and form a neat bundle. Place this bundle on a plate or cutting board and put a heavy object on top, like a cast-iron skillet or a pot filled with water. The amount of time you press it depends on your desired firmness. For a softer paneer perfect for bhurji, 15-20 minutes is enough. For cubes that will hold their shape in a curry, press for 30-40 minutes. Pressing for too long (an hour or more) will squeeze out too much moisture and make your paneer hard and dense.