



The Great Dough Debate
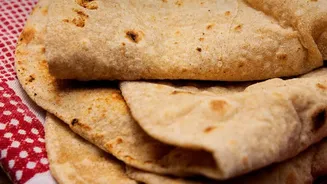
In the world of Indian breads, dough is everything, and not all doughs are created equal. The most common mistake in poori-making is treating the dough like you would for a roti or chapati. Roti dough is prized for its softness and pliability, achieved
by using a generous amount of water to create a supple, easy-to-roll texture. This is ideal for cooking on a dry tawa. Poori dough, however, follows a completely different philosophy. It must be firm, stiff, and kneaded with significantly less water. When you press a finger into poori dough, it should feel resistant and barely yield, unlike the soft pillow of a good roti dough. This firmness is non-negotiable for success.
The Science of the Puff
Why is a firm dough so crucial? The magic of a poori puffing up is a simple act of physics. When the thinly rolled disc of dough is submerged in hot oil, the moisture trapped within it rapidly turns into steam. This steam needs to escape. On a properly prepared poori, the hot oil quickly seals the outer surfaces, trapping the expanding steam inside. This trapped steam pushes against the inner walls of the poori, forcing it to inflate like a balloon. A soft, overly moist dough (like roti dough) hinders this process. It contains too much water, which can cause the poori to become soggy and absorb excess oil instead of puffing. A firm dough has less water, which creates a more explosive burst of steam, leading to a dramatic puff and a less greasy result.
Kneading for Success
Kneading a firm poori dough requires a bit more effort. Start with your whole wheat flour (atta), a pinch of salt, and perhaps a teaspoon of semolina (suji) for extra crispiness. Add water sparingly, a little at a time, until the flour just comes together into a crumbly mix, then a cohesive but stiff ball. It will feel tough and might even look a bit rough or cracked initially. Knead for a few minutes until it's uniform, but avoid over-kneading, which can make it too soft. Once kneaded, let the dough rest for a short period—just 15 to 30 minutes—covered with a damp cloth. This brief rest relaxes the gluten just enough to make rolling easier without letting the dough soften too much. Resting it for too long can make it absorb more oil during frying.
Beyond the Dough: Rolling and Frying
Even with the perfect dough, technique matters. When rolling the pooris, avoid using dry flour for dusting, as the excess flour burns in the hot oil, making it dirty and giving the pooris a bitter taste. Instead, lightly oil your work surface and rolling pin. Roll the dough balls into discs of even thickness—about 2mm. If they are too thin, they won't have enough room to puff and may turn out crispy like a papad. If they are too thick, they may not cook through. The final, critical step is the oil temperature. The oil must be hot, but not smoking. Test it by dropping a tiny piece of dough in; it should sizzle and rise to the surface immediately. When you slide a poori in, gently press it down with a slotted spoon to encourage it to puff. Once it balloons, flip it and cook for another few seconds until golden. The entire process for one poori should only take about 20-30 seconds.
Troubleshooting Common Poori Problems
If your pooris are still giving you trouble, here are some quick fixes. If they aren't puffing up, the most likely culprits are a dough that is too soft, rolling them too thin, or oil that isn't hot enough. If your pooris are absorbing too much oil, your dough was almost certainly too soft, or the oil temperature was too low. Remember, a soft dough is porous and will soak up oil like a sponge. For hard or leathery pooris, the dough was likely too dry or wasn't rested enough, making it difficult to roll evenly.