
The Foundation: A Lump-Free Batter
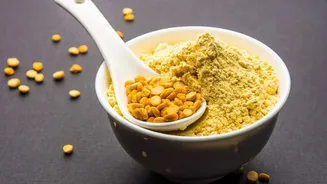
The secret to perfect khandvi begins with the batter. This is not the time for guesswork; precise measurements are crucial. The classic ratio is typically one part gram flour (besan) to three parts liquid, which is usually a combination of sour yogurt
(or buttermilk) and water. Using sour yogurt provides the characteristic tanginess. To achieve a silky, smooth consistency, it's highly recommended to use a blender or an immersion blender. This eliminates any chance of lumps, which are the primary culprits of an uneven texture. If you are mixing by hand, whisk the besan and yogurt together first to form a paste, then gradually add the water while continuing to whisk until the mixture is completely smooth and watery. Season the batter with turmeric, salt, and a paste of ginger and green chillies for that authentic flavour. Passing the batter through a sieve before cooking provides extra insurance against lumps.
The Crucial Cooking Stage
Cooking the batter is where the magic, and the challenge, lies. The goal is to thicken it to a paste-like consistency without overcooking it. Use a heavy-bottomed or non-stick pan to prevent scorching. Pour the batter into the pan and cook over a low to medium flame, stirring continuously. Constant stirring is non-negotiable; if you stop, the besan will form lumps and stick to the bottom. This process requires patience, generally taking anywhere from 7 to 17 minutes depending on your stove and pan. The batter is ready when it no longer tastes of raw flour, turns glossy, and becomes thick enough that it clings to your spatula. The most reliable way to know if it's done is the plate test. Spread a small spoonful of the batter onto a plate, let it cool for a minute, and then try to roll it. If it rolls up cleanly without breaking or sticking, your batter is perfectly cooked. If it doesn't roll, it needs more time on the stove.
The Art of Spreading and Rolling
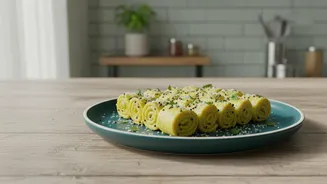
Once your batter passes the test, speed is of the essence. The mixture begins to set as it cools, so you must work quickly. Have your surfaces ready before the batter is even finished cooking. You can use the back of steel plates (thalis), a clean kitchen countertop, or silicone mats. Interestingly, most recipes advise against greasing the surface, or using only a tiny drop of oil, as too much can make the batter difficult to spread. Pour a ladleful of the hot batter onto your surface and immediately use a spatula or dough scraper to spread it into a very thin, even layer. The thinner the layer, the more delicate and numerous your rolls will be. If the sheets are too thick, they are more likely to crack when you roll them. Let the spread sheets cool for about 5 to 10 minutes. Once cool, use a knife or pizza cutter to cut them into strips about two inches wide. Gently and tightly roll up each strip, starting from one end.
Troubleshooting Common Khandvi Fails
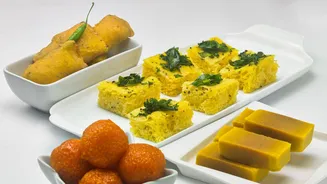
Even with careful steps, issues can arise. If your khandvi cracks while rolling, it usually means the batter was slightly overcooked and became too dry, or the spread layer was too thick. If it's too sticky and won't roll, the batter was likely undercooked. The plate test is your best defence against both of these problems. If you find your batter is setting too quickly in the pan and becoming impossible to spread, it has become too thick. While not ideal, you can salvage it by spreading the mixture into a greased dish, letting it set, and cutting it into squares, like dhokla. If the batter is too thin and watery and refuses to thicken, it's a sign the flour-to-liquid ratio was off. Unfortunately, simply cooking it longer won't fix a major ratio error.
The Finishing Touch: Tempering and Garnish
No khandvi is complete without its flavourful tempering, or 'tadka'. To prepare it, heat a small amount of oil in a pan. Add mustard seeds and let them crackle. Then, add asafoetida (hing), sesame seeds, sliced green chillies, and curry leaves. Sauté for just a few seconds until fragrant, and then immediately pour this sizzling mixture over the arranged khandvi rolls. This step adds a wonderful aroma and a contrasting texture to the soft rolls. For the final garnish, sprinkle generously with freshly grated coconut and finely chopped coriander leaves. Serve your beautiful, homemade khandvi at room temperature, often with a side of green chutney, as a delightful snack or appetiser.