





Gather Your Simple Toolkit
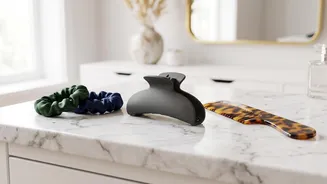
The beauty of this hairstyle lies in its simplicity, and the tools required are just as minimal. You won’t need a salon's worth of products to achieve a polished look. Before you begin, gather a hairbrush or comb, one or two small, clear elastics, and a few
bobby pins that match your hair colour. A light-hold hairspray or a texturising spray is also helpful for adding grip and ensuring your style lasts all day, but it's not strictly necessary. If your hair is very clean or silky, a spritz of dry shampoo can add some texture, making the twists easier to manage and hold in place.
Step 1: Section and Smooth
Start by brushing your hair to remove any knots or tangles, ensuring a smooth canvas. This style works beautifully on straight, wavy, or curly hair. Decide on your part—middle or side—or simply brush your hair straight back. Using your fingers or a comb, create your first section by taking a two-to-three-inch piece of hair from one side, starting at your temple and moving toward the back of your head. For a softer, face-framing effect, leave a few tendrils or a small section of hair out at the front.
Step 2: Create the First Twist
Take the section of hair you've just created and begin to twist it. Start twisting away from your face, moving backward toward the crown of your head. Don't twist too tightly; a looser twist creates a softer, more romantic look. As you twist, you can gently pull on the edges of the twisted section to add volume and texture, a technique often called 'pancaking'. Once the twist reaches the back-centre of your head, temporarily secure it with a clip while you work on the other side.
Step 3: Repeat and Secure
Now, repeat the process on the other side of your head. Take a similar-sized section of hair from the other temple and twist it away from your face until it meets the first twist at the back of your head. Once both twists are in place, you have a couple of options to secure them. You can either cross one twist over the other and pin them discreetly with bobby pins, or you can join the ends of both twists together with a small, clear elastic band for a more secure hold.
Pro-Tips for Polish and Longevity
To elevate the look and ensure it lasts from your morning coffee to your evening commute, there are a few finishing touches. If you used an elastic, you can hide it by taking a small strand of hair from the ponytail, wrapping it around the elastic, and securing the end underneath with a bobby pin. For added volume at the crown, gently lift the hair just behind the secured twists with your fingers or the end of a comb. A final, light mist of hairspray will help tame any flyaways and lock the style in place without making it stiff.
Easy Variations to Try
This hairstyle is incredibly versatile. For a more bohemian feel, you can braid the sections instead of twisting them. Another option is to create a single twist on one side and pull it across the back of your head, pinning it behind the opposite ear. You can also play with accessories; a decorative clip, barrette, or even a ribbon can be placed over the secured section to add a personal touch and a pop of style. For a dressier occasion, curling the loose, bottom half of your hair can add extra elegance and romance.