






Choose a Healthy Parent Plant
The first step to success is choosing the right source. Look for a healthy, robust parent plant that is actively growing and free from pests or diseases. Avoid taking cuttings from plants that look stressed, yellowed, or weak. For beginners in India,
plants like money plant (pothos), hibiscus, coleus, and snake plant are excellent choices as they root easily. The best time to take a cutting is usually during the plant's growing season, which for many houseplants is in the spring and summer. Taking cuttings from new, vigorous growth often yields the best results.
Make the Perfect Cut
Technique matters. Always use a clean, sharp tool like pruning shears or a knife. Sterilising your tool with rubbing alcohol prevents the spread of disease to both the parent plant and your new cutting. Aim for a cutting that is about 4-6 inches long. The cut itself should be made just below a node — the small bump on the stem where a leaf grows. This node is where new roots are most likely to sprout. A clean, angled cut increases the surface area for rooting and prevents the stem from sitting flush against the bottom of your container, which can cause rot.
Prepare the Cutting for Rooting
Once you have your cutting, a little preparation is needed. Carefully remove the lower leaves from the bottom two-thirds of the stem. Any leaves left below the surface of the water or soil will rot, potentially ruining the entire cutting. If the remaining leaves at the top are very large, you can snip them in half. This reduces the amount of moisture the leaf loses through transpiration, allowing the cutting to focus its energy on growing roots instead of supporting large leaves. Also, be sure to pinch off any flowers or flower buds, as these also divert energy away from root production.
Choose Your Rooting Medium
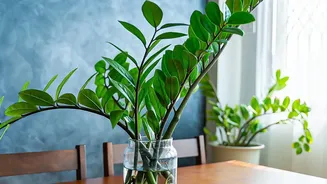
You have two primary choices for rooting: water or soil. Water propagation is popular because it allows you to see the roots as they grow. Simply place the prepared cutting in a jar of clean water, ensuring the nodes are submerged but the leaves are not. Change the water every few days to keep it fresh and oxygenated. Rooting in a soil-less mix, however, often leads to stronger, more robust root systems that transition to a pot more easily. For this method, dip the end of the cutting in a rooting hormone powder to encourage faster growth. Plant it in a small pot with a moist, well-draining medium like a mix of cocopeat and perlite.
Provide the Right Environment
Patience is key, but so is the right environment. Cuttings need bright, indirect light—direct sunlight will scorch them. They also thrive in humidity. To create a mini-greenhouse effect for soil-rooted cuttings, you can cover the pot with a clear plastic bag, making sure the plastic doesn't touch the leaves. This helps keep the cutting hydrated while it works on developing roots. For water cuttings, simply keep them out of direct sun. Keep the soil consistently moist but not waterlogged to prevent rot.
Potting Your New Plant
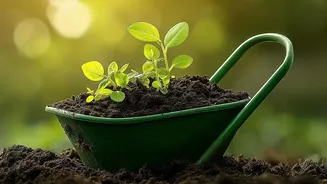
How do you know when it's time to pot? For water-propagated cuttings, wait until the new roots are about one to two inches long. For soil cuttings, you can give a very gentle tug; if you feel resistance, it means roots have formed. This can take anywhere from a few weeks to a couple of months. Once ready, transplant your newly rooted cutting into a small pot with fresh, well-draining potting soil. Water it well and keep it in a spot with indirect light as it adjusts to its new home. Avoid moving it to a pot that is too large, as this can lead to overwatering issues.