





Gathering Your Supplies
Before you begin, you’ll need a few basic items. For beginners, soy wax flakes are an excellent choice as they are natural, easy to use, and hold scent well. You will also need candle wicks with metal bases, which are easiest to work with, and heat-safe
containers like glass jars or tins. To create a signature scent, select your preferred candle fragrance oils. Finally, you will need a pouring pot or a heat-proof pitcher to melt the wax, a larger pot to create a double boiler, and something to hold the wick in place, like a clothespin or a wick bar. A kitchen thermometer is also highly recommended for best results.
The Simple Step-by-Step Process
First, prepare your containers by washing and drying them thoroughly. Use a wick sticker or a bit of hot glue to secure the metal base of your wick to the center of the jar's bottom. Next, measure your soy wax flakes. A good rule of thumb is to fill your container twice with the flakes to get the right amount of wax for one candle. Melt the wax gently using a double boiler method—place your pouring pot with the wax inside the larger pot of simmering water. Never leave melting wax unattended. Heat the wax to around 85°C (185°F). Once melted, remove it from the heat.
Creating Your Signature Scent
This is where the magic happens. While essential oils can be used, fragrance oils specifically formulated for candles often provide a stronger and more stable scent. The key is to add the fragrance oil when the wax has cooled slightly, typically to around 85°C (185°F). Adding it when the wax is too hot can cause the fragrance to burn off. Use about 30 ml of fragrance oil for every 500 grams of wax, but you can adjust this based on your preference. Stir the oil into the wax gently but thoroughly for about two minutes to ensure it is fully incorporated. For an Indian touch, consider timeless fragrances like sandalwood, jasmine, rose, or warm and spicy blends.
Pouring and Curing Your Candle
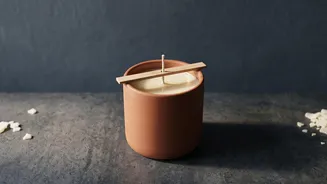
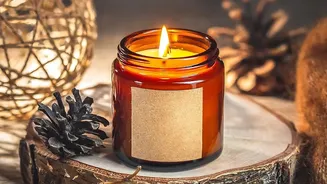
After mixing in the fragrance, let the wax cool to about 55-60°C (130-140°F) before pouring. This helps prevent cracks and ensures a smooth top. Pour the wax slowly and steadily into your prepared container. Use a clothespin or wick bar laid across the top of the jar to hold the wick straight and centered. Now comes the hardest part: patience. Allow the candle to cool and cure at room temperature for at least 24 hours before trimming the wick and lighting it. Curing for a week or even two will result in a much better scent throw when you finally burn your creation.
Essential Safety Precautions
Safety is paramount when working with hot wax. Always use a double boiler to control the temperature and never melt wax directly over a flame. Keep a fire extinguisher nearby as a precaution. Never leave melting wax unattended, and keep children and pets away from your work area. Ensure your workspace is well-ventilated to avoid inhaling too many fumes from the fragrance oils. When burning your finished candle, always trim the wick to about a quarter of an inch before each use and never leave a burning candle unattended or near flammable objects.