





The Joy of Propagation
Plant propagation is the process of creating new plants from an existing one. While it might sound technical, the method of rooting cuttings in water is one of the most accessible and rewarding projects for any plant owner. It’s a fantastic way to fill
your home with more greenery without spending a rupee, create thoughtful, living gifts for friends and family, or simply rescue and replicate a beloved plant. Watching roots emerge from a simple stem cutting is a fascinating process that connects you more deeply to the lifecycle of your plants.
Choosing the Easiest Plants
While not all plants are suited for water propagation, many common and beloved houseplants take to it with ease. For beginners, it's best to start with soft-stemmed, vining plants known for their eagerness to root. Some of the most reliable choices include Pothos (Epipremnum aureum), Heartleaf Philodendron, Spider Plants (Chlorophytum comosum), and Tradescantia (Inch Plant). Other great candidates are Monstera varieties, Syngonium (Arrowhead Plant), and even herbs like mint and basil. These plants are forgiving and tend to show root growth relatively quickly, which is encouraging for first-timers.
How to Take a Cutting
The success of your propagation starts with a proper cut. You will need a clean, sharp pair of scissors or pruning shears. First, identify a healthy stem on the mother plant. Look for a section that is firm and has several leaves. The most crucial part to find is a 'node'—the small bump on the stem where leaves and aerial roots grow. Your new roots will emerge from this point. Make your cut about a quarter-inch below a node. Aim for a cutting that is about 4-6 inches long. Once you have your cutting, carefully remove the leaves from the bottom half, ensuring at least one or two nodes are bare. Any leaves left submerged in water will rot and contaminate it.
The Magic of Rooting in Water
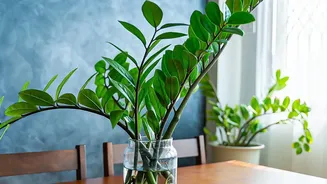
Now for the simple part. Place your prepared cutting into a clean glass jar, vase, or bottle. A clear container is ideal because it allows you to watch the roots develop and monitor the water quality. Fill the container with room-temperature water, making sure the bare nodes are submerged but the remaining leaves are well above the waterline. Place the jar in a spot that receives bright, indirect light. Direct sunlight can be too intense and may scorch the cutting or encourage algae growth. Now, all that's left to do is wait and observe.
Care and Patience
To keep your cutting healthy, change the water every few days or at least once a week. This prevents the buildup of bacteria that can cause the stem to rot. Don't be discouraged if you don't see roots immediately. The rooting time varies widely depending on the plant, with some like Pothos showing growth in a week or two, while others might take a month or longer. Keep an eye out for small, white roots emerging from the nodes. This is the sign that your propagation is a success.
From Water to Soil
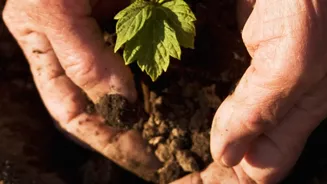
Once the new roots are about one to two inches long, your cutting is ready for its new home in a pot. Waiting too long can make the transition from water to soil more difficult for the plant. Prepare a small pot with fresh potting mix. Gently place the rooted cutting into the soil, fanning the roots out, and fill the pot, lightly tamping the soil to secure the plant. Water it thoroughly, allowing excess water to drain out. For the first few weeks, keep the soil consistently moist (but not soggy) to help the water-acclimated roots adjust to their new environment. Some experts suggest a gradual transition by adding a little soil to the water jar each day before the final transfer.