
The Appeal of Paper Art
Forget heavy frames and expensive canvases. The latest trend in home decor is all about the humble sheet of paper. By folding, cutting, and arranging simple pieces of coloured paper, you can create intricate, three-dimensional installations that capture
light and shadow beautifully. This form of wall art is celebrated for its accessibility and versatility. Whether you're aiming for a minimalist geometric pattern or a vibrant, flower-like explosion of colour, paper provides an affordable medium for creative expression. It’s a project that can be as simple or as complex as you wish, making it perfect for both novice crafters and seasoned artists.
Choosing the Right Materials
The success of your project starts with selecting the right paper. For most folded designs, it's best to use lightweight paper that holds a crease well without being too bulky. Origami paper is an excellent choice, as it's designed specifically for folding and comes in a vast array of colours and patterns. For projects that require a bit more structure, consider cardstock, which is available in various weights. Lighter cardstock is great for layered designs, while heavier weights provide more rigidity. Beyond paper, you will need a few basic tools: a ruler, a craft knife or scissors, and a reliable adhesive. For mounting your finished pieces, options like double-sided tape, foam mounting tape, or removable wall putty are ideal because they won't damage your walls.
Mastering Simple Techniques
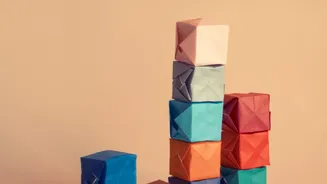
You don't need to be an origami master to create beautiful paper decor. Many stunning designs are based on simple, repetitive folds. One popular technique involves folding the corners of a square piece of paper to its centre point, creating a basic 3D diamond or square shape. When arranged together in a grid, these simple forms create a sophisticated, textured look. Another approach is kirigami, which involves both folding and cutting paper to create more intricate patterns. You can start with basic geometric folds to create triangles, hexagons, or pyramids. By making many of the same shape in different colours or shades, you can build a large-scale piece with an impressive visual impact.
Designing Your Wall Installation
Before you start sticking shapes to the wall, take some time to plan your design. You could create a focal point above a sofa or bed, or cover an entire wall for a dramatic effect. Consider an ombre pattern, transitioning from a dark shade to a light one, to add depth and visual interest. Another idea is to arrange the pieces in a specific shape, like a heart, a geometric spiral, or a cascading wave. Sketching your idea on a piece of paper first can help you visualise the final result. You can also lay out your folded pieces on the floor to finalise the arrangement before committing it to the wall. This allows you to play with spacing and flow until you have a composition you love.
Easy and Damage-Free Installation
One of the biggest advantages of paper decor is that it's incredibly lightweight, making installation a breeze. Foam mounting tape or squares are a fantastic option for adding a bit of extra dimension, making your shapes appear to float off the wall. Cut thin strips and place them along the main creases of your paper shapes to secure them. For a less permanent solution, removable wall putty is perfect, allowing you to rearrange your art whenever you feel inspired to change things up. Make sure the wall surface is clean and dry before you begin. Start by placing the central or key pieces of your design first, then build outwards, using a level if you're aiming for a precise grid or geometric pattern.