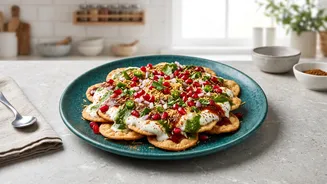

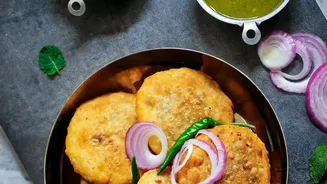
The explosion of sweet, spicy, and tangy flavours is what makes papdi chaat a national obsession. But the true hero of this street food classic is the papdi itself. The secret to a truly great chaat lies in its signature crunch.
The Soul of the Snack
Papdi chaat is more than
just a dish; it's a multi-sensory experience. At its heart are the papdis—small, crisp, deep-fried crackers that serve as the foundation for a mountain of delicious toppings. A good papdi isn't just a vehicle for chutneys and yogurt; it's a crucial textural element. It must be light and crispy, with a satisfying snap that doesn't dissolve into sogginess the moment it meets the toppings. A bad papdi, on the other hand, can be hard, chewy, or greasy, turning the entire dish into a disappointment. Mastering the papdi is the first and most important step to recreating authentic chaat at home.
The Anatomy of a Perfect Papdi
The secret to an ideal papdi lies in the dough. The goal is to create a texture that is crisp and flaky, not hard or bread-like. This is achieved by carefully controlling gluten development. Three elements are key: the flour, the fat, and the kneading process. Most recipes call for all-purpose flour (maida), but some add semolina (sooji) for an extra-crisp texture that holds up well against wet toppings. The fat, usually ghee or oil, is rubbed into the flour to create a crumbly, breadcrumb-like mixture. This process, known as 'moyan', coats the flour particles and shortens gluten strands, ensuring a flaky, melt-in-the-mouth finish rather than a tough, chewy one.
Crafting the Dough: Tips for Success
To achieve the perfect texture, your dough must be stiff and firm, not soft and pliable like a chapati dough. A soft dough will absorb too much oil during frying, resulting in greasy papdis that become soft quickly. Add water sparingly, a little at a time, until the dough just comes together. Once kneaded into a tight ball, cover it with a damp cloth and let it rest for at least 15 to 30 minutes. This resting period allows the gluten to relax, making the dough easier to roll out thinly and evenly.
Rolling and Frying to Golden Perfection
Rolling the dough correctly is critical. It must be rolled very thin; a thick papdi will end up soft and chewy on the inside. After rolling, it is essential to prick the surface of each disc multiple times with a fork. This step prevents the papdis from puffing up like a puri during frying, ensuring they remain flat and crispy. Frying should be done in medium_hot oil. If the oil is too hot, the papdis will brown too quickly on the outside while remaining raw inside. If it's not hot enough, they will absorb excess oil. Fry the papdis on a low to medium flame, turning them occasionally until they are a pale golden brown and the sizzling has subsided. This slow_and_low method ensures they cook through and become perfectly crisp.
Assembling the Symphony of Flavours
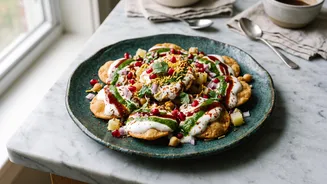
Once you have your perfectly crisp papdis, it's time for the fun part. The beauty of papdi chaat lies in its layers of contrasting flavours and textures. Begin by arranging the papdis on a plate. Top them with a mix of boiled potatoes, boiled chickpeas, and finely chopped onions. Next, generously spoon over chilled, lightly sweetened whisked yogurt (dahi). Drizzle with sweet tamarind chutney and spicy mint_coriander chutney. The interplay between the sweet, tangy, and spicy chutneys is what gives chaat its signature flavour profile.
The Final Flourish
The final touches are what elevate papdi chaat from a simple snack to a masterpiece. Sprinkle a mix of roasted cumin powder, chaat masala, and a pinch of black salt and red chilli powder over the top. For a final layer of crunch and visual appeal, garnish generously with fine nylon sev, fresh coriander leaves, and perhaps some vibrant pomegranate seeds for a juicy burst of sweetness. The key is to serve it immediately, while the papdis are still at their crunchiest and the yogurt is cool and creamy, delivering that perfect, unforgettable bite.