Discover the art of crafting the perfect raita: a refreshing side dish that complements spicy Indian meals flawlessly. Learn the secrets to creating a culinary masterpiece that balances flavors and textures
effortlessly. Dive into this guide for a delightful culinary experience!
Raita, ah, the quintessential Indian side dish! It's like that dependable friend who always knows how to cool things down, especially when you're dealing with a fiery plate of biryani or a spicy curry. But making the perfect raita isn't just about slapping some yogurt and veggies together.
There's an art to it, a subtle magic that elevates it from a simple condiment to a culinary masterpiece. Let's dive into the secrets of crafting raita that will have everyone asking for seconds! It is very popular and the perfect combination of cooling and refreshing taste.
This dish is usually an accompaniment to most meals and it is very easy to make.
Creating the perfect raita: balance of flavors, textures, and consistency is key
So, what makes a truly great raita? It's all about the balance of flavors and textures. You want the cooling tang of yogurt, the crunch of fresh vegetables, and a subtle hint of spice to tie it all together.
The consistency is also key – it shouldn't be too runny or too thick, but just right, clinging lovingly to every morsel of food it accompanies. Think of it has a wonderful side dish. The balance of flavour is a very important aspect of creating the best form of flavours.
There are always multiple ways the flavour can be presented and having it with curd makes the texture have a very soft and cooling effect.
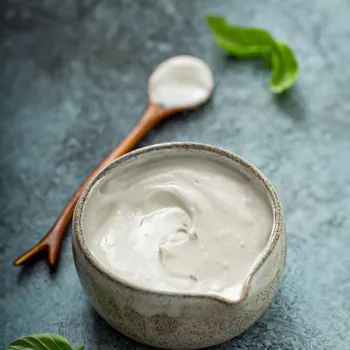
Choosing the right yogurt is crucial for a rich, creamy raita
Now, let's talk yogurt. This is the base of our raita, so choosing the right one is crucial. Full-fat yogurt will give you the richest, creamiest raita, but low-fat or Greek yogurt work just as well, especially if you're watching your calories.

Just make sure it's fresh and doesn't have that sour taste which can be off putting. You can also try using homemade yogurt for an extra touch of authenticity. Whisk the yogurt well before adding any other ingredients to ensure a smooth, lump-free base.
Adding a tablespoon or two of milk can also help loosen it up if it's too thick. Try to avoid over stirring the yoghurt otherwise it can become very watery. Fresh produce can often add to the flavour and freshness. There can often be other types of raita that is commonly found.
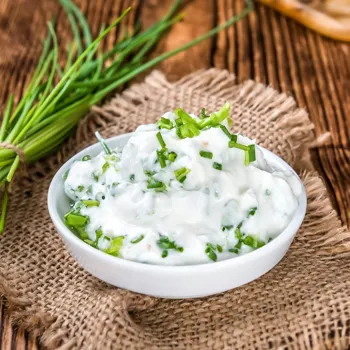
Get creative with veggie choices for flavorful raita
Next up, the veggies! This is where you can really get creative. Cucumber is a classic choice, providing a refreshing crunch. Grate the cucumber or finely chop it, and squeeze out any excess water to prevent the raita from becoming too watery.

Other popular options include onions (finely chopped, of course), tomatoes (deseeded and diced), and carrots (grated). You can even add finely chopped green chilies for a little extra heat, or fresh herbs like coriander or mint for a burst of freshness.
Remember to chop the vegetables very finely so it evenly distributed when eaten. This will allow the raita to taste even and balanced. Adding a little bit of spice can go a long way, adding things like cumin powder or black salt can add more flavour.
Enhance flavor with cumin, black salt, chili, chaat masala, pepper, garam masala in small amounts
Now for the spices! A pinch of roasted cumin powder is a must-have, adding a smoky, earthy flavor. Black salt (kala namak) is another great addition, lending a unique aroma and slightly sulfuric taste that pairs beautifully with the yogurt and vegetables.
You can also add a pinch of red chili powder for a touch of warmth, or a sprinkle of chaat masala for that tangy, flavorful kick. The key is to start with small amounts and taste as you go, adjusting the spices to your liking.
A sprinkle of freshly ground pepper can go a long way in improving flavour. A small amount of garam masala can also elevate the flavour.
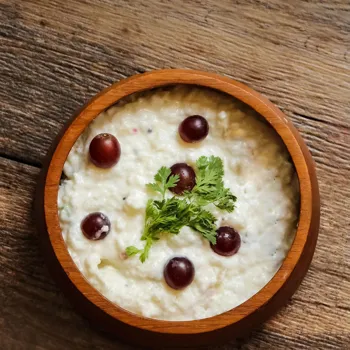
Combine yogurt, veggies, spices; adjust consistency, chill, garnish
Finally, the assembly! In a bowl, combine the whisked yogurt with your chosen vegetables and spices. Mix everything together gently until well combined. Taste and adjust the seasoning as needed. If the raita is too thick, add a little bit of milk or water to thin it out.
If it's too watery, add a spoonful of yogurt. Once you're happy with the flavor and consistency, cover the raita and chill it in the refrigerator for at least 30 minutes before serving. This allows the flavors to meld together and the raita to cool down properly.
Garnish with a sprig of coriander or mint before serving, and enjoy! The raita can be made a few hours before consumption, just store in the refrigerator. This ensures the flavours stay fresh and also allow time for the ingredients to settle together.
AI Generated Content. Glance/InMobi shall have no liability for the content