Selecting Your Clay
The foundation of any durable and aesthetically pleasing lantern lies in the choice of clay. Earthenware is a favored option due to its malleability and suitability
for low-temperature firing, making it accessible for home crafters. It's crucial to source clay that is free from foreign particles, as these can introduce weaknesses and lead to undesirable cracks during the firing process. For those new to clay work, it's advisable to begin with smaller projects to familiarize yourself with its consistency and how it responds to shaping and manipulation before embarking on your lantern creation.
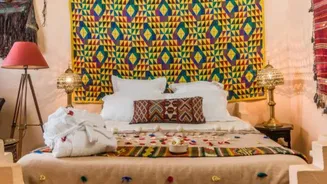
Designing Your Vision
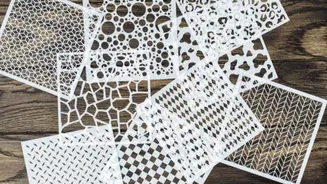
This stage is where your artistic vision truly comes to life. Begin by translating your ideas onto paper, sketching out the desired form and patterns. Incorporate elements inspired by traditional African artistry, such as intricate geometric designs or symbolic tribal motifs. These decorative choices not only enhance the visual appeal but can also serve to convey cultural narratives or represent significant symbols. Once your design is finalized on paper, carefully transfer these lines and shapes onto the clay surface using specialized tools like styluses or carving knives, preparing it for the next steps.
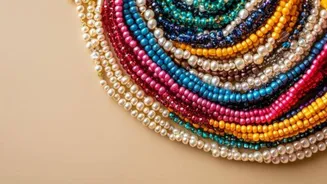
Embellishing with Beads
Beads are a fantastic way to introduce vibrant colors and interesting textures, significantly elevating the beauty of your crafted lanterns. Select bead colors that complement your overall design theme; earthy hues like rich browns, deep reds, and warm yellows often align well with the aesthetic of traditional African art. To affix the beads, create small, deliberate indentations on the clay surface at your chosen placement points. These small hollows will provide a secure base for the beads, ensuring they adhere firmly before the firing process begins.
The Firing Process
Firing is a critical step that solidifies the clay and ensures the longevity of your handcrafted lanterns. Ideally, use a kiln for this purpose, as it provides consistent heat distribution, which is essential for preventing stress fractures and breakage. If a kiln is not accessible, a standard oven can be used, provided you meticulously follow the clay manufacturer's specific instructions regarding temperature and duration, usually found on the clay's packaging. Proper firing is paramount to transforming your decorative pieces into robust, enduring works of art.
Finishing Touches
After your lanterns have been fired and cooled, the final stage involves painting and applying any necessary finishing touches. Opt for non-toxic paints that are suitable for both indoor and outdoor environments, depending on where you plan to display your creations. If your chosen paints or the clay itself require it, apply a sealant according to product directions to enhance durability and protect the finish. This meticulous final step ensures that your lanterns are not only visually stunning and safe to handle but also a lasting tribute to the rich cultural heritage they represent.